
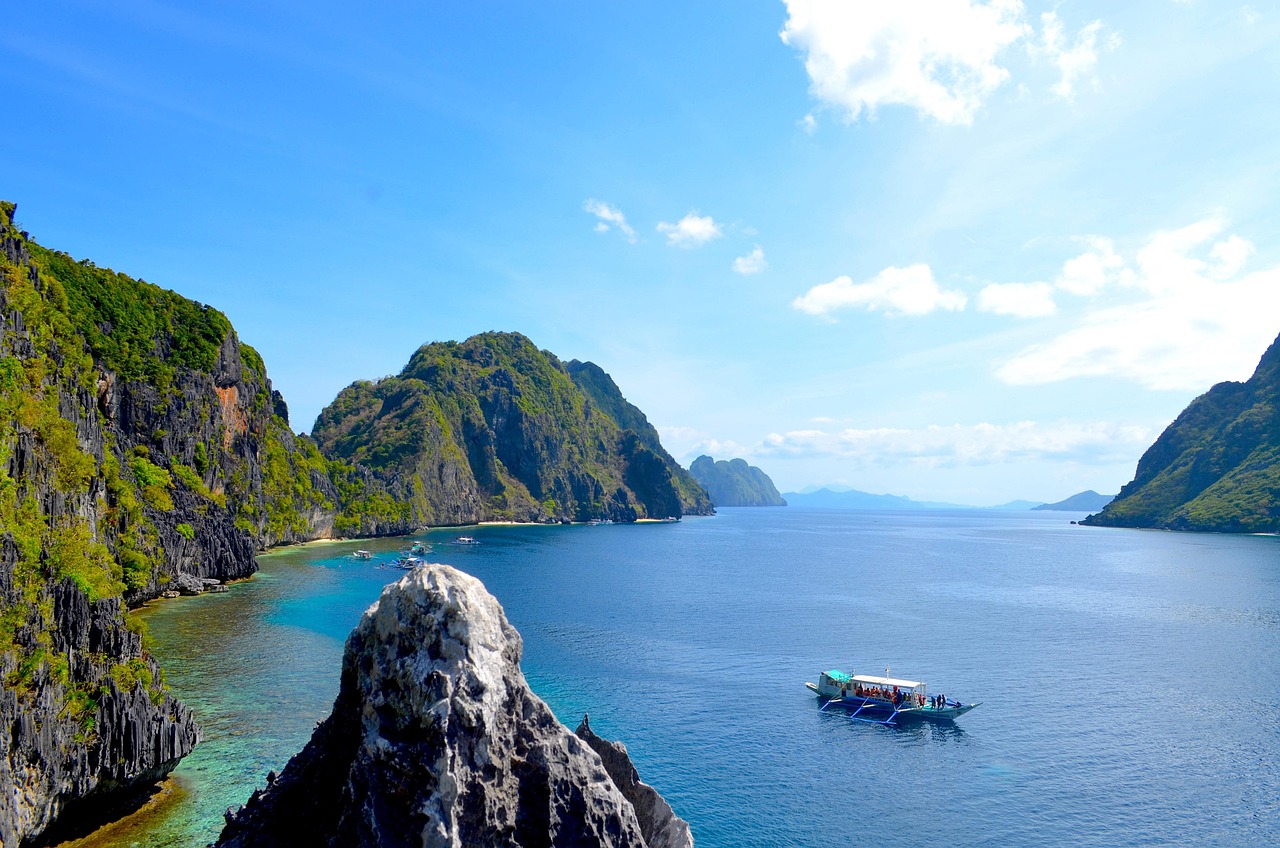
El Nido is one of the most photographed destinations in the Philippines, and once you see Bacuit Bay with your own eyes, you’ll understand exactly why. The limestone karst cliffs shooting straight up from turquoise water, the hidden lagoons glowing green at midday, the traditional bangka boats drifting across glassy bays at sunrise. It’s the kind of place where you run out of storage before you run out of subjects.
But getting truly stunning shots here takes more than just pointing your camera at something pretty. This El Nido photography guide covers the best spots, the best timing, drone rules, and a few things most visitors don’t know until their second trip. Save yourself the learning curve.
Why El Nido Is a Photographer’s Paradise
Most beach destinations give you one or two strong visual elements. El Nido gives you ten. Within a single day on the water, you can photograph sheer limestone walls reflected in still lagoons, colorful reef fish darting through the shallows, fishing villages nestled between cliff faces, and skies that turn amber and pink as the sun drops behind the South China Sea. The light here is genuinely different, softer than most tropical destinations because of the way the cliffs diffuse and direct it.
The main island hopping routes (Tour A, B, C, and D) each pass through distinct landscapes. Our El Nido island hopping Tour A guide covers the lagoon circuit, while Tour C takes you to open-water islands with a more rugged, dramatic look. Each tour offers completely different photo opportunities, so if photography is your priority, you’ll want to do more than one.
Best Photo Spots in El Nido

Big Lagoon, Miniloc Island
This is the shot that ends up on every El Nido travel blog, and for good reason. Big Lagoon is about 45 minutes by bangka from El Nido town. You enter through a narrow gap in the cliffs and emerge into an enclosed body of water ringed by 200-meter limestone walls. The color shifts from deep blue at the entrance to a shallow turquoise green toward the back. Kayak rentals cost around ₱200 and let you go deeper into the lagoon than the tour boats do. The reflection shots from inside are remarkable on calm mornings.
Insider tip: get here before 9am. By 10am the lagoon fills with tour boats and the reflections disappear in the chop. Book an early departure through our El Nido island hopping tours to get first access.
Small Lagoon
Smaller, but in many ways more photogenic. The entrance is too narrow for boats, so you swim or kayak through a low arch in the rock. Inside, the water is shallow, crystal clear, and completely calm. The light at midday bounces off the white sand bottom and illuminates the walls in a way that makes everything glow. Wide-angle shots work brilliantly here. So do underwater photos if you have a waterproof housing.
Secret Beach
You swim through a small underwater gap to reach this one, which is part of the appeal. The beach inside is tiny, maybe 30 meters wide, enclosed on all sides by cliffs. It photographs like a natural amphitheater. The best angle is from the waterline looking back at the cliff walls with the white sand in the foreground. Mid-morning light hits the walls at a nice angle. Go on Tour C.
Nacpan Beach
A 4-kilometer stretch of white sand about 45 minutes north of El Nido town by tricycle (roughly ₱500 for the hire). Nacpan photographs completely differently from the lagoon circuit. It’s open, wide, and expansive. Long exposure shots work well at either end of the day. The far end of the beach connects to Calitang Beach at low tide, creating a twin-beach formation that looks spectacular from any elevated vantage point nearby. Check our Nacpan Beach guide for logistics.
El Nido Town Pier
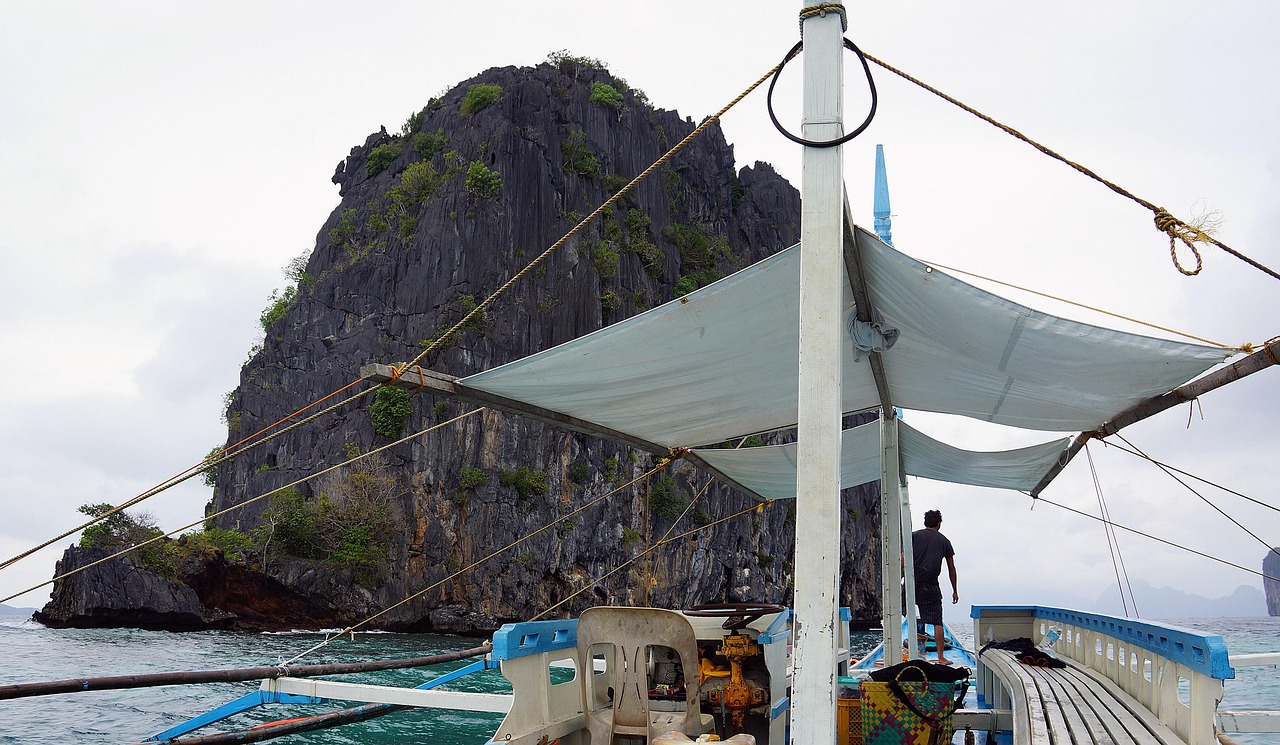
Don’t underestimate the town itself. The main pier at blue hour, just before sunrise, gives you silhouettes of bangka boats against a gradient sky. The boats are traditional outriggers with bamboo pontoons, and they stack up beautifully in foreground layers. This spot costs you nothing but an early alarm. Walk down to the pier around 5:15am.
Golden Hour and Blue Hour in El Nido
Golden hour in El Nido is genuinely special. Sunrise comes around 5:30am to 5:45am depending on the season, and for about 30 minutes the light is warm, directional, and completely different from midday. The karst cliffs take on an amber color. Sunset on the western side of Bacuit Bay is equally dramatic, and you can often see the sun drop behind small offshore islands creating layered silhouette shots.
Blue hour starts immediately after sunset, around 6:15pm to 6:30pm. The sky transitions through purple and deep blue, and if you’re positioned at the town pier or any open westward-facing beach, you’ll get color gradients that no filter can replicate. The PAGASA weather service is useful for checking cloud cover during peak photography conditions.
For sunset, Corong-Corong Beach just south of the town center is a local favorite. It’s a 20-minute walk or short tricycle ride. The beach faces west and the view across the bay toward the cliffs at sunset is something you’ll want to spend an hour shooting, not five minutes.
Drone Photography Rules in El Nido
Here’s the thing about flying drones in El Nido: it’s legally and logistically complicated. El Nido is within the Palawan Council for Sustainable Development (PCSD) protected area jurisdiction, which means any commercial drone use requires permits. Even recreational drone flying is subject to the Civil Aviation Authority of the Philippines (CAAP) registration requirements under CAAB regulations.
Practically speaking: register your drone with CAAP before leaving Manila if you plan to fly legally. Drones are not allowed over crowded beach areas, inside protected lagoons, or within certain distances of private resorts without permission. The fine for unauthorized commercial drone use can reach ₱50,000 or more. Many drone photographers simply skip the lagoon shots and focus on open-water areas or elevated land positions where fewer restrictions apply.
If drone photography is a primary goal for your trip, build in at least a full day to scout locations and check local conditions. Early morning flights (before 8am) generally have better light, calmer winds, and fewer people on the water.
Camera Gear for El Nido
Salt water, high humidity, and constant boat rides are hard on camera gear. A few practical notes from experience:
- Waterproof housing or a quality dry bag is non-negotiable. Bangka boats get splashed regularly on open-water crossings between islands.
- A UV filter on your lens protects against salt spray and is much cheaper to replace than front element glass.
- Wide-angle lenses (16-35mm equivalent) perform best inside the lagoons. Longer focal lengths (70-200mm) are useful for boat silhouettes and compressed cliff shots from distance.
- An underwater camera or GoPro-type device lets you document snorkeling stops at no risk to your main camera.
- Bring twice the memory cards and batteries you think you need. Power cuts in El Nido town are not rare.
Practical Tips for Better El Nido Photos

Book private tours instead of group tours when photography is a priority. Group island hopping tours (which typically cost ₱1,500 per person) move on a fixed schedule and rarely stop for the light. A private boat hire through CMT’s private tour options costs more but lets you control timing entirely. If you can afford it, it makes a significant difference in your shots.
Talk to your boatman. Local boat operators know the light patterns, the tides, and the spots that don’t appear on any map. When we were at Shimizu Island on a Tour B trip, our boatman pointed out a rock formation on the far end of the island that gave a perfect framing of the cliffs behind it. No blog mentioned it. That kind of local knowledge is worth more than any gear.
Visit during the dry season (November through May) for the best conditions. Skies are clearer, seas are calmer, and the visibility for underwater photography is at its peak. The Lonely Planet El Nido page has a useful overview of seasonal conditions if you’re still in the planning stage.
Finally: wake up early. Every single time. The light before 8am in El Nido is categorically better than anything you’ll get between 10am and 3pm. Set the alarm, drink the coffee, and get to wherever you want to shoot before the crowds arrive.
Frequently Asked Questions
What is the best time of day to photograph El Nido’s lagoons?
Early morning, ideally before 9am. The water is calm, the light is soft and directional, and the tour crowd hasn’t arrived yet. Big Lagoon and Small Lagoon both reflect the cliffs beautifully when the surface is still.
Can I bring a drone to El Nido?
You can bring a drone, but flying legally requires CAAP registration and, for commercial use, additional PCSD permits. Recreational flying is technically allowed in approved areas but is restricted near protected zones, resorts, and populated beaches. Check current regulations before your trip.
Which El Nido island hopping tour has the best photo spots?
Tour A covers Big Lagoon, Small Lagoon, and Secret Lagoon, making it the best for enclosed, dramatic lagoon photography. Tour C covers Secret Beach and open-water islands with a different, more rugged look. Doing both gives you the full range.
Is El Nido good for underwater photography?
Yes. The snorkeling stops on Tour A, B, and C all have healthy coral and fish life. Visibility is best from December through April when seas are calm and there’s less runoff. A waterproof compact or GoPro is all you need for impressive underwater shots.
What camera settings work best for the lagoons?
In bright midday conditions, shoot at ISO 100, f/8 to f/11, and let the shutter speed adjust. For golden hour reflections, drop to f/5.6 and bump ISO slightly if needed. A polarizing filter cuts through the surface glare and reveals the underwater color beneath, which makes a significant visual difference in lagoon shots.
Do I need a waterproof camera bag in El Nido?
Yes, it’s strongly recommended. Bangka boats take on spray on open-water crossings, and island transfers often involve wading through shallow surf to board or exit. A dry bag or waterproof camera bag is cheap insurance compared to the cost of water-damaged gear.
How do I get from El Nido town to the best photo spots?
Most lagoon and island spots are accessed by bangka on group or private island hopping tours. Nacpan Beach is reached by tricycle from town (about ₱500 for the hire, 45 minutes each way). The town pier and Corong-Corong Beach are both walking distance from the main strip.
Ready to shoot El Nido at its best? Book your island hopping tour with us and tell your boatman you want early morning access to the lagoons. Our El Nido island hopping tours depart early and keep group sizes small, giving you the shots that most tourists miss. Check availability through CMT Ticketing and Services and let’s plan your perfect photography day.